Done with this quick paint build!
Went for a dual tone color scheme, nothing too complicated other than the masking.
Mods done include neck extension, improvement to legs articulation, and replace thrusters with metal thrusters.
Paints used:
White - Off White + Blue
Brownish White - Off White + Mahogany
Grey - Black + White + Neutral Grey
Dark Blue - Cobalt Blue + Mixed Dark Gray
Silver - Starbright Duralumin
Thanks for looking!!!
Thursday, April 4, 2013
[WIP] HGUC Unicorn Gundam Unicorn Mode
Took a short break from the VP Strike Freedom, already super burnt out after priming it.
Since I have this already primed kit lying around, I decided to finish painting it.
So I thought... how hard could it be painting a full white kit? WRONG!!!
Masking was a not only a nightmare, it was a nightmare within a nightmare! Well, cause I went for a dual tone color scheme, so I guess I could only blame myself..
Painted inner frame grey and masked off certain areas and paint white over.
For the white parts, mask off certain areas again and paint over other color tone. And some miscellaneous parts in silver.
Masking come off, results well worth the time spent!
Dry-fitted again before panel lining and decals to see overall effect of the color scheme.
And a duo shot with the other unicorn.
Since I have this already primed kit lying around, I decided to finish painting it.
So I thought... how hard could it be painting a full white kit? WRONG!!!
Masking was a not only a nightmare, it was a nightmare within a nightmare! Well, cause I went for a dual tone color scheme, so I guess I could only blame myself..
Painted inner frame grey and masked off certain areas and paint white over.
For the white parts, mask off certain areas again and paint over other color tone. And some miscellaneous parts in silver.
Masking come off, results well worth the time spent!
Dry-fitted again before panel lining and decals to see overall effect of the color scheme.
And a duo shot with the other unicorn.
Labels:
HGUC Unicorn Gundam Unicorn Mode,
WIP
Friday, March 29, 2013
[WIP] 1/100 VP Strike Freedom Part 3
Accumulated enough progress to compile into an update!!
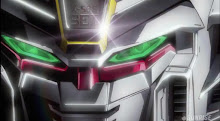
1st round of priming completed. Most parts are ready for painting but there are still some which require additional filling and sanding.
The other most frustrating part of MG Strike Freedom kit other than the seamlines, separation of parts to allow easy painting and assembly.
Many different methods available online, here's how I separated them.
Priming from bottom up, feet first. Ankle extension.
And... the rest of the it...
1st round of priming completed. Most parts are ready for painting but there are still some which require additional filling and sanding.
The other most frustrating part of MG Strike Freedom kit other than the seamlines, separation of parts to allow easy painting and assembly.
Many different methods available online, here's how I separated them.
Priming from bottom up, feet first. Ankle extension.
And... the rest of the it...
Sunday, March 17, 2013
[WIP] 1/100 VP Strike Freedom Part 2
Restarted on this project when I started on it end of 2012. Been sitting on my table for almost 3 full months while I worked on other kits. Time to give it the attention it needs :D
Start of with the most dreaded part of MG Strike Freedom kit... long and deep seamlines, and not to mention a whole load of them.
Took about a week of sanding and filling to achieve satisfactory results after priming.
But there's still some minor irregularities that require touchup.
The dragoon holders each have a small resin part attached to it, secured with pin and superglue.
Start of with the most dreaded part of MG Strike Freedom kit... long and deep seamlines, and not to mention a whole load of them.
Took about a week of sanding and filling to achieve satisfactory results after priming.
But there's still some minor irregularities that require touchup.
The dragoon holders each have a small resin part attached to it, secured with pin and superglue.
Subscribe to:
Posts (Atom)