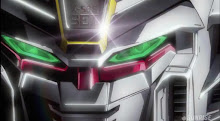
I'm calling this kit done! I wanted a super clean look so didn't do any panel lining and only added 2 decals to the shoulder and front skirt.
Dragoons were all super-glued so they can't be removed. Gave overall a mist of gloss coat to kinda blend things together.
Not
the best finishing I would say, the gold paint really brought out even
the tiniest bit of surface imperfection that wasn't seen after priming.
Can notice quite a number of them if u look at the model like from 5cm
away
Anyways paints used:
Gold: Gaia Starbright Gold over Gaia Black Surfacer Evo
Bronze: Gaia Starbright Gold + Gunze Orange
Candy Red: Gunze Clear Red over Gaia Starbright Gold
Grey: Gaia German Grey + some White
Thanks for looking! Comments and critiques welcomed!
Showing posts with label VP Akatsuki. Show all posts
Tuesday, September 11, 2012
Monday, September 10, 2012
[WIP] 1/100 VP Akatsuki Part 3
Continued working on this kit. Painted the other colors.
I decided to go with a candy red using clear red over the gold for the feet parts. Also mixed orange with gold to get that bronze color on some areas.
Encountered some problems when masking where the masking tape pulled off the all the paint including primer, no choice but to sand off and repaint those areas.
Face piece painted as well. Candy red for the 'chin', green for the eyes. Used a blue foil sticker for the head sensor as area too awkward for painting.
Brush painted the grey parts for the resin hands, smaller in size compared to the original hands.
Still left to touch up the dragoon pieces, panel line, decal and top coat and I'm done!
I decided to go with a candy red using clear red over the gold for the feet parts. Also mixed orange with gold to get that bronze color on some areas.
Encountered some problems when masking where the masking tape pulled off the all the paint including primer, no choice but to sand off and repaint those areas.
Face piece painted as well. Candy red for the 'chin', green for the eyes. Used a blue foil sticker for the head sensor as area too awkward for painting.
Brush painted the grey parts for the resin hands, smaller in size compared to the original hands.
Still left to touch up the dragoon pieces, panel line, decal and top coat and I'm done!
Sunday, September 9, 2012
[WIP] 1/100 VP Akatsuki Part 2
Exams are over, so I have more time now to work on this project. Done cleaning up all the nubs and primed the parts.
Lots of problematic areas revealed with primer... Sinkholes, rough surfaces make up most of it, just putty and sand away.
Did some testing for the main gold color. Tried out 2 different gold paints (Gaia Bright Gold and Gaia Starbright Gold) over 2 different base paints (Black Surfacer and Gloss Black).
Starbright Gold looks richer, more yellowish than Bright Gold. The rough texture is from the card I used, not from the paint.
Painting of main gold color using Starbright Gold over black surfacer.
Lots of problematic areas revealed with primer... Sinkholes, rough surfaces make up most of it, just putty and sand away.
Did some testing for the main gold color. Tried out 2 different gold paints (Gaia Bright Gold and Gaia Starbright Gold) over 2 different base paints (Black Surfacer and Gloss Black).
Starbright Gold looks richer, more yellowish than Bright Gold. The rough texture is from the card I used, not from the paint.
Painting of main gold color using Starbright Gold over black surfacer.
Wednesday, August 29, 2012
[WIP] 1/100 VP Akatsuki Part 1
Exams almost over, but already starting on my next project!
Kit: Vicious Project Akatsuki resin conversion
Recasted by: Super-G
Base frame: MG Strike Gundam (I'm using the launcher strike version, no difference)
Big box with lots of parts, a teeny weeny decal sheet, colored instruction manual (poorly printed).
Total: 93 parts, include parts for both the Owashi and Shiranui packs
First thing to do is to wash the molding grease off the parts. I soak them in chlorhexidine (its main purpose is to kill bacteria not to clean resin, but it does work fine) solution overnight, use a toothbrush to scrub every angle and surface.
Start of with the torso area, requires some cutting of the inner frame to fit in the resin pieces. Waist area still uses the Strike's frame but waist armour pieces replaced except for the rear armour.
Shoulder pieces simply replaced with the resin parts. Whole of lower arm replaced as well, lousy fitting in this area, seems like the resin parts shrunk leaving quite a huge gap in the middle.
Head replaced with resin Akatsuki head (5 individual pieces), alot slimmer than Strike's head.
For the leg region, thigh, lower leg armour, ankle joint and front feet replaced with resin parts.
I will be doing only the Shiranui pack, so only tackle those parts. Massive full resin backpack and heavy with 7 dragoon pieces, not sure whether the Strike's frame is able to take the weight.
Did some dryfitting while removing the nubs. Looking good already!
Kit: Vicious Project Akatsuki resin conversion
Recasted by: Super-G
Base frame: MG Strike Gundam (I'm using the launcher strike version, no difference)
Big box with lots of parts, a teeny weeny decal sheet, colored instruction manual (poorly printed).
Total: 93 parts, include parts for both the Owashi and Shiranui packs
First thing to do is to wash the molding grease off the parts. I soak them in chlorhexidine (its main purpose is to kill bacteria not to clean resin, but it does work fine) solution overnight, use a toothbrush to scrub every angle and surface.
Start of with the torso area, requires some cutting of the inner frame to fit in the resin pieces. Waist area still uses the Strike's frame but waist armour pieces replaced except for the rear armour.
Shoulder pieces simply replaced with the resin parts. Whole of lower arm replaced as well, lousy fitting in this area, seems like the resin parts shrunk leaving quite a huge gap in the middle.
Head replaced with resin Akatsuki head (5 individual pieces), alot slimmer than Strike's head.
For the leg region, thigh, lower leg armour, ankle joint and front feet replaced with resin parts.
I will be doing only the Shiranui pack, so only tackle those parts. Massive full resin backpack and heavy with 7 dragoon pieces, not sure whether the Strike's frame is able to take the weight.
Did some dryfitting while removing the nubs. Looking good already!
Subscribe to:
Posts (Atom)