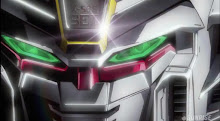
Final update for this project.
Got down to panel lining, decaling and finishing off with a flat coat. Whoever thought Eypon had so many decals......
Thanks for looking!
Monday, June 23, 2014
Sunday, June 15, 2014
[WIP] MG Epyon Part 4
Finished painting the kit. Left to decal, panel line and flat coat.
Waist section. Shading not so visible on the dark blue parts as the color is too similar to the black undercoat. Probably will be more obvious after the final flat coat.
Some photos of the shading process. Tedious but rewarding to see the effect. Black primer to act as the base coat, then spray red paint in the middle of the panels using a small spray size.
Managed to mix the purplish grey tone for the thighs and the back of the hands. Totally satisfied with this tone.
Waist section. Shading not so visible on the dark blue parts as the color is too similar to the black undercoat. Probably will be more obvious after the final flat coat.
Some photos of the shading process. Tedious but rewarding to see the effect. Black primer to act as the base coat, then spray red paint in the middle of the panels using a small spray size.
Managed to mix the purplish grey tone for the thighs and the back of the hands. Totally satisfied with this tone.
Dry fit to see overall effect. Shading still visible. XD
Thanks for looking!
[WIP] MG Epyon Part 3
Most of the painting done over this period.
I went for a metallic scheme for the inner frame. I was actually thinking of using Gaia Starbright iron for the inner frame, but since I was too lazy to go out, I made do with what I had currently.
Color test on pla-plate with black primer underneath. Left is Mr Hobby Steel and the other is Mr Hobby Burnt Iron. Seemed like burnt iron comes out a little rough despite being thinned more, so I went for the steel color.
Mixed some paint for the main reddish color, but it came out too purplish. Repainted the head with a more pure red paint.
Thanks for looking!
I went for a metallic scheme for the inner frame. I was actually thinking of using Gaia Starbright iron for the inner frame, but since I was too lazy to go out, I made do with what I had currently.
Color test on pla-plate with black primer underneath. Left is Mr Hobby Steel and the other is Mr Hobby Burnt Iron. Seemed like burnt iron comes out a little rough despite being thinned more, so I went for the steel color.
Mixed some paint for the main reddish color, but it came out too purplish. Repainted the head with a more pure red paint.
Thanks for looking!
Monday, June 2, 2014
[Review] 1/35 Nu Head
Purchased this kit for a 1/35 Nu head build with 2 other modellers.
A quick unboxing review of the contents.
Kit is re-casted by Super-G. Standard packaging from Super-G and casted in cream color resin.
Contents include:
- Resin parts with separate pack for the delicate v-fin
- Reference photo of the completed kit
- Acrylic base
- Water slide and metal decals
- LED and battery pack
A quick unboxing review of the contents.
Kit is re-casted by Super-G. Standard packaging from Super-G and casted in cream color resin.
Contents include:
- Resin parts with separate pack for the delicate v-fin
- Reference photo of the completed kit
- Acrylic base
- Water slide and metal decals
- LED and battery pack
All parts laid out and accounted for. A total of 40 parts including 3 transparent parts. V-fin came with a cardboard backing for support.
Surface is relatively smooth, hands felt a little greasy after handling the parts. Grease on the parts needs to be removed during the washing stage.
Details are quite alright, some parts are crisp, while there are some with uneven surfaces.
Some close up photos of the resin details.
Some pictures of the completed kit by other modellers from the internet, or rather pictures that made me buy this kit <.<
Thanks for looking!!!
Subscribe to:
Posts (Atom)